Making your own jewelry is one of the easiest way to look trendy without splurging on pieces that you might only wear for a couple of times before burying them in the back of your closet. Plus, you'll be the only one rocking your one-of-a-kind jewelry. But if you decide not to wear them anymore, at least you wouldn't feel bad about it because the cost of making them is dirt cheap.
Start ransacking your dad's toolbox and your grandmother's sewing kit for supplies to make this super easy bracelet that cost less than RM2 to make!
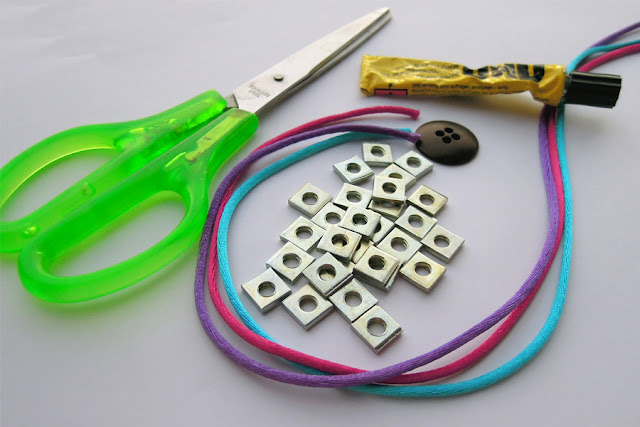
You'll need:
- 14 screw nuts (ie: square nuts, hex nuts, etc)
- Three 23cm satin rope
- A large button
- Scissors
- Heavy duty glue
Methods:
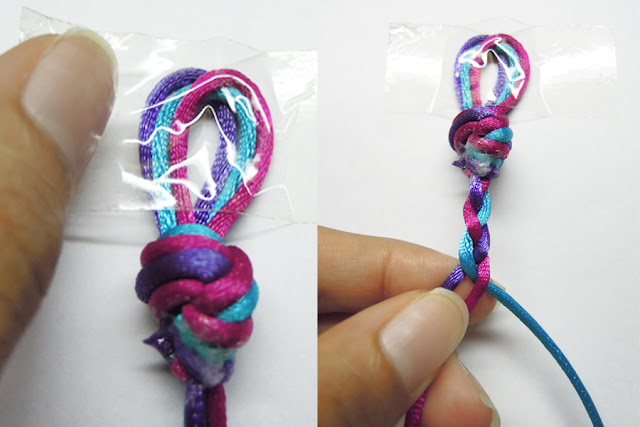
1. Gather the three satin ropes at one end and tie all of them together with a loop knot as a closure to the bracelet.
2. Glue the ends of the knot you made earlier to secure it in place. Then, trim off the excess rope.
3. Tape your ropes to your work surface to anchor them in place and prevent them from sliding. Alternatively, you can clip the ropes to a clipboard. Then, start braiding your ropes for 1/2 - 1 inch depending on your personal preference and the size of your wrist.
4. Add a screw nut to the outer rope on the right and push it all the way to the top, then cross it over the middle rope to hold the screw nut in place.
5. Add another screw nut to the outer rope on the left and push it all the way to the top, then cross it over the middle rope again like regular braiding. Make sure that you only add the screw nuts to the outer ropes one at a time and never the middle rope.
6. After you've used up all the screw nuts, make a regular braid like in Step 3 for about 1/2 - 1 inch.
7. Tie two ropes (side and middle) together with a knot using the other side rope.
8. Push the rope you used to tie a knot earlier through one of the button holes from the back.Then, push it through another hole diagonally from the top, then, under and over again through the remaining holes to form a crisscross pattern.
9. Tie a knot at the back of the button to secure it in place. Trim off all the excess ropes. Don't forget to add glue to the ends of the knots to secure them in place as well.
Voila! You have a new bracelet. Make sure you allow the glue to dry before you wear it out.

What do you think?
Don't forget to leave a comment and tell me what you think!


